
Storeroom Inventory Assignment
Overview
The Storeroom Inventory ManagementAssignment module on the iHospitality Hub lets employees manage a storeroom's stock directly from a shared kiosk device — either assigning new stock into a storeroom or deducting stock that's been used or consumed. Both are simple, form-based actions that update that storeroom's item counts once approved.
This module only appears on hubs where Storeroom Inventory
ManagementAssignment was checked under Hub Modules, and only for employees whose User Role has Can iHospitality Hub Login enabled — see the iHospitality Hub – Setup page.
Inventory Management Screen
After signing in and tapping Storeroom Inventory ManagementAssignment, the employee sees twothe options.option.
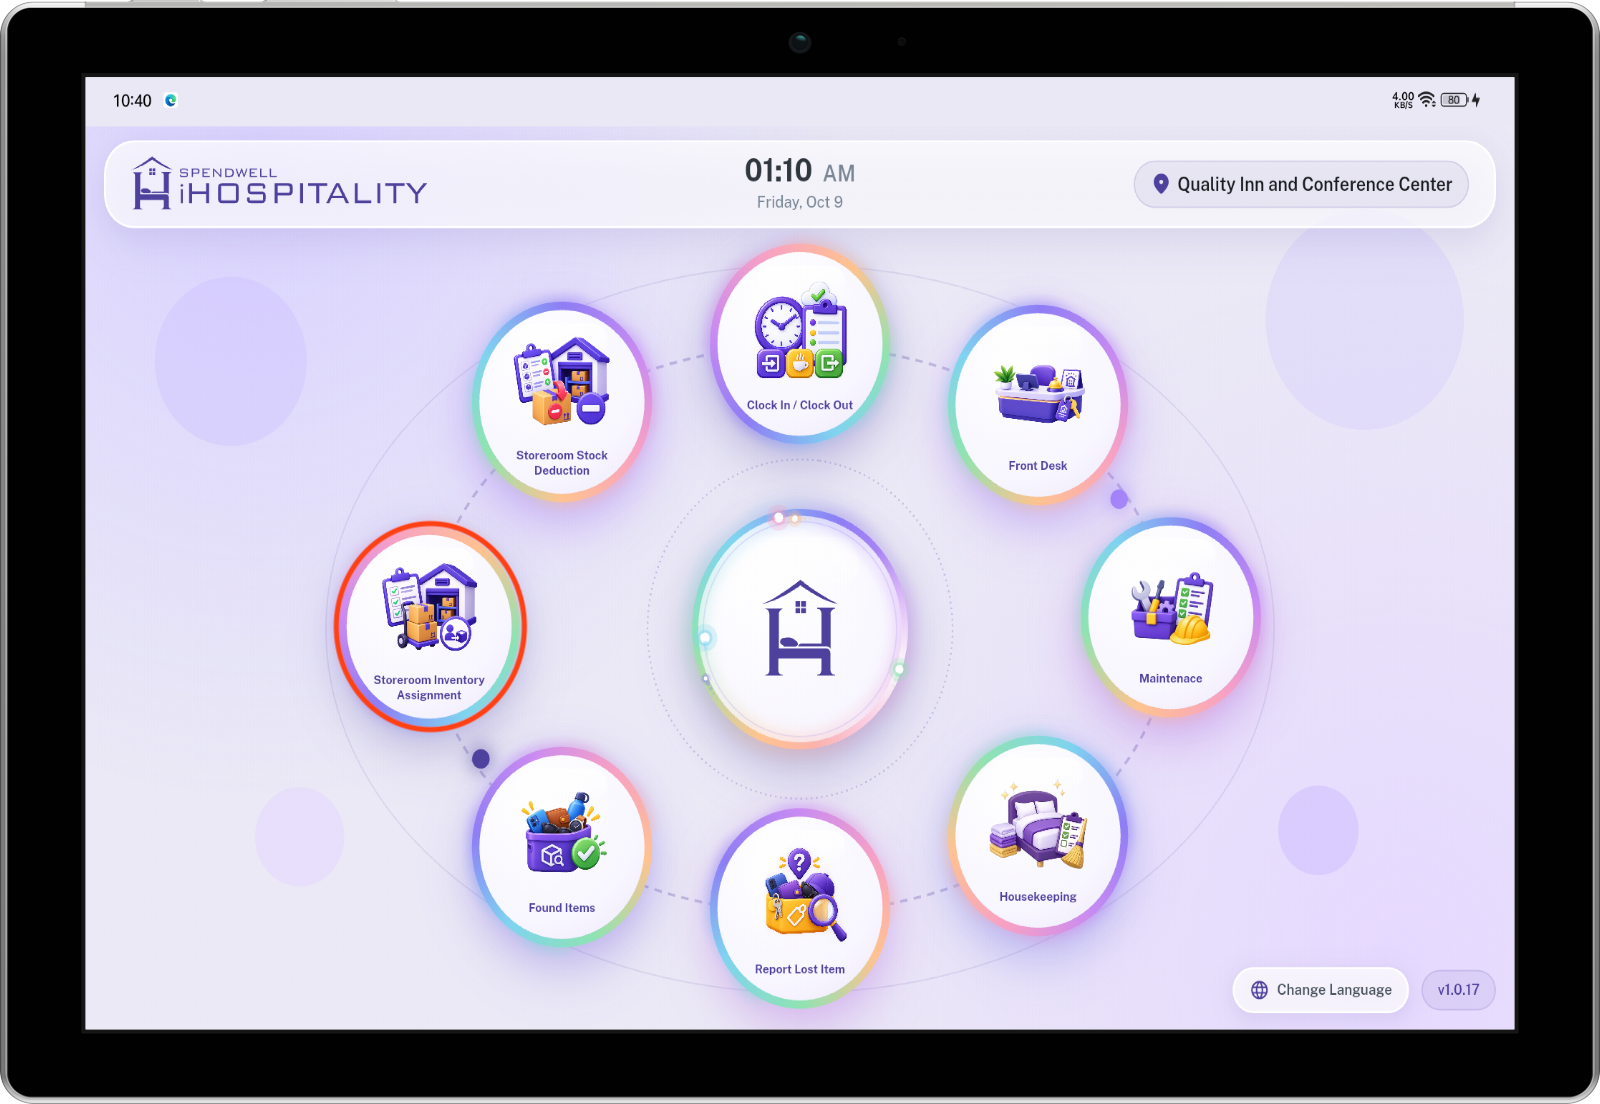
What this screen means: pick Assign Inventory to add stock into a storeroom, or Deduct Stock to remove stock that's been used or consumed.storeroom. Which action to take depends on what the employee is there to do — receiving new stock vs. logging what was used.
Assign Inventory
Adds stock into a chosen storeroom.
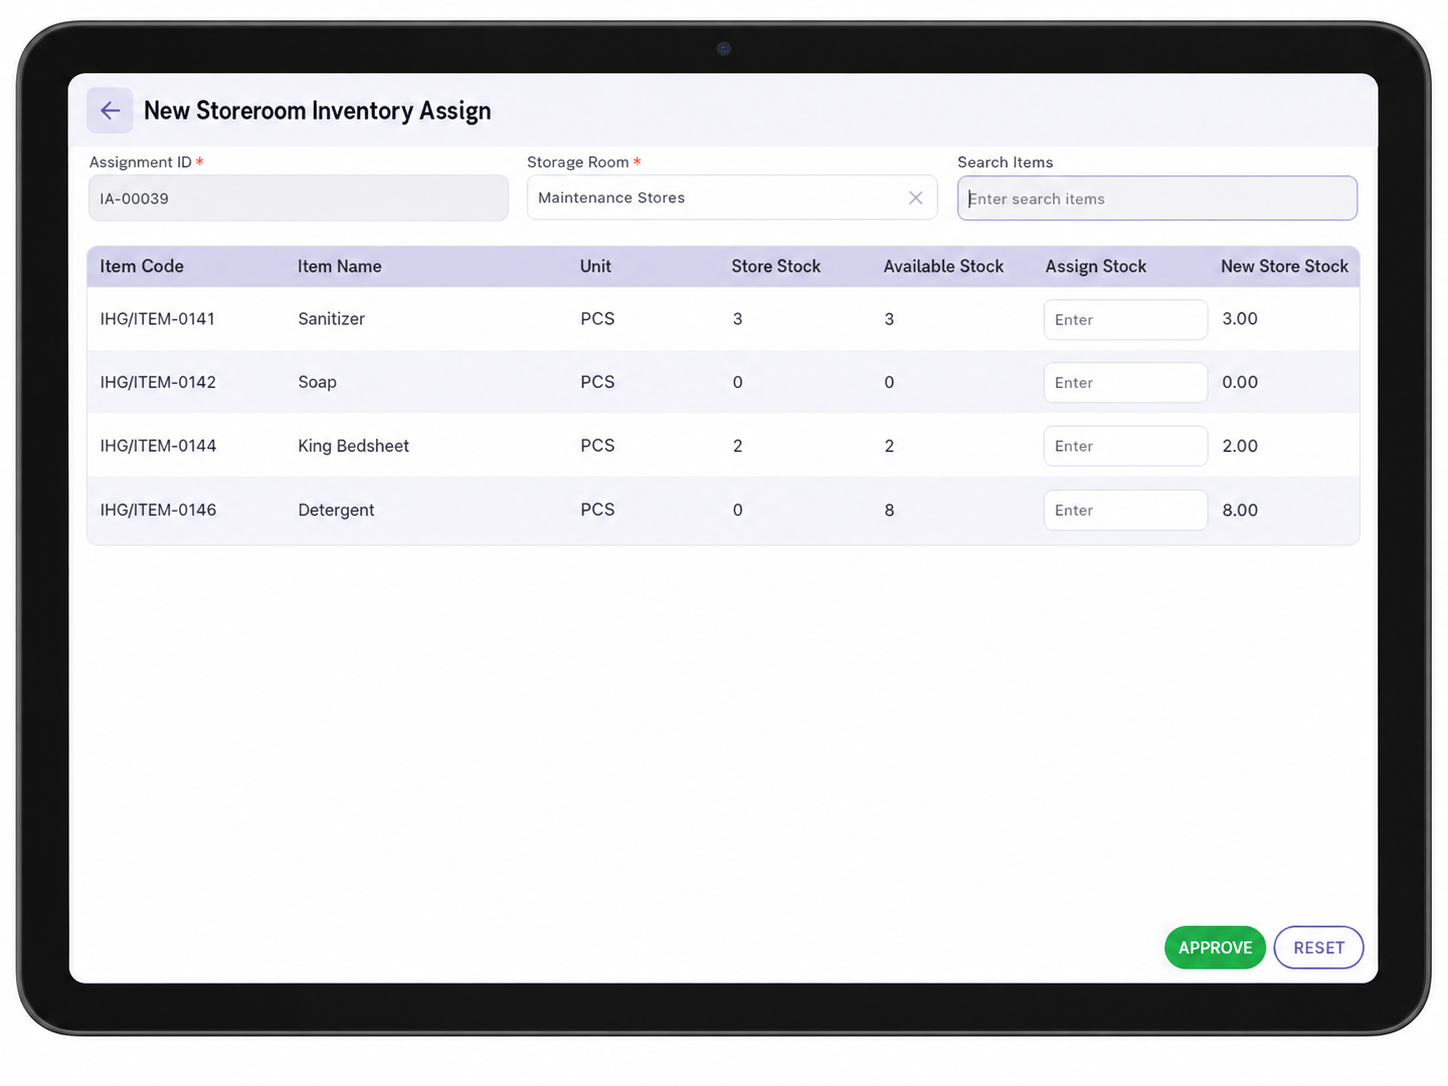
What this screen means: chooseChoose the storeroom, then enter how much of each item to add. The screen shows both what's currently in that storeroom and what's available to assign, before anything is approved.
Key Fields
| Field | Description |
|---|---|
| Assignment ID | Auto-generated, e.g. IA-00039. Read-only. |
| Storage Room | Required — the storeroom this assignment is for, e.g. "Maintenance Stores." |
| Search Items | Search box to find items to add to the table below. |
| Item Code / Item Name / Unit | Identifies the item and its unit of measure (e.g. PCS). |
| Store Stock | The quantity of this item currently in this storeroom, before this assignment. |
| Available Stock | The quantity of this item available from overall inventory to be assigned into this storeroom. |
| Assign Stock | The quantity the employee wants to assign into this storeroom — editable input. |
| New Store Stock | Auto-calculated preview of what the storeroom's stock will become once approved: Store Stock + Assign Stock. |
Steps
- Tap Assign Inventory from the Inventory Management screen.
- Select the Storage Room to assign stock into.
- Use Search Items to find the item(s), or scroll the table.
- For each item, enter the quantity to add in Assign Stock. New Store Stock updates automatically to show the result.
- Tap APPROVE to confirm the assignment, or RESET to clear the form.
Deduct Stock
Removes stock from a chosen storeroom once it's been used or consumed.
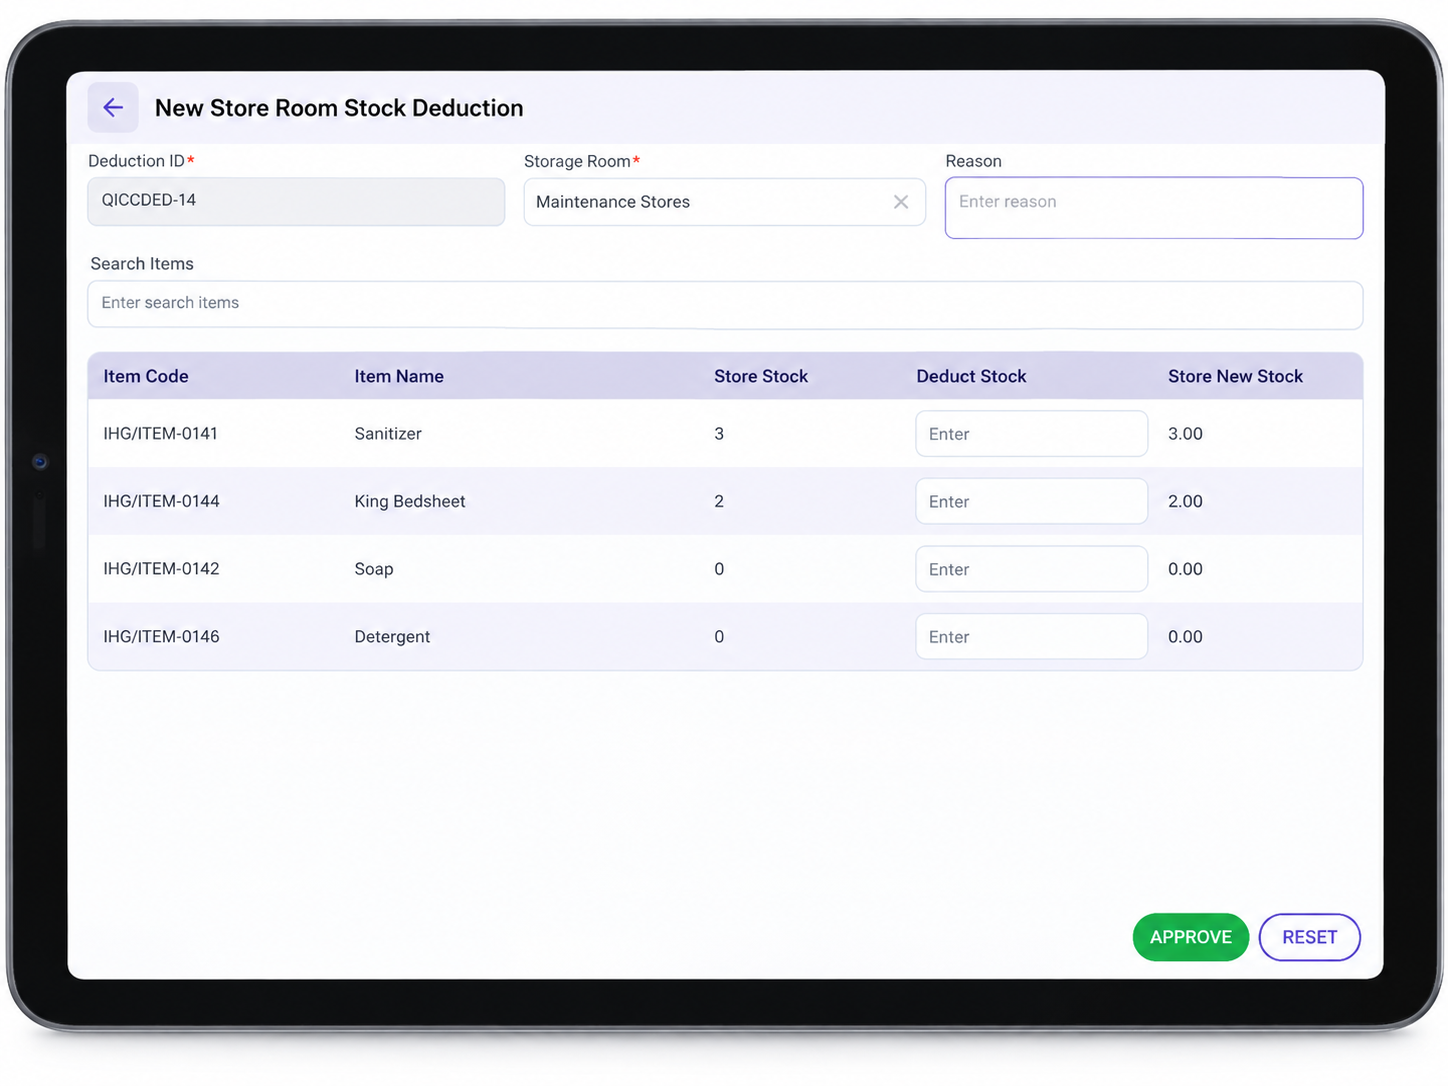
What this screen means: choose the storeroom and enter how much of each item was used — the form shows the resulting stock level before you approve it.
Key Fields
| |
Note: the Deduct Stock table has fewer columns than the Assign table — there's noUnitorAvailable Stockcolumn here, since deduction only concerns what's already in this storeroom.
Steps
TapDeduct Stockfrom the Inventory Management screen.Select theStorage Roomthe deduction is coming from.Enter aReasonfor the deduction.UseSearch Itemsto find the item(s), or scroll the table.For each item, enter the quantity used/consumed inDeduct Stock.Store New Stockupdates automatically to show the result.TapAPPROVEto confirm the deduction, orRESETto clear the form.
Workflow
Employee taps Inventory Management → Identifies via PIN/face → Chooses Assign Inventory or Deduct Stock → Selects Storage Room → Enters quantities per item → Reviews New/Store New Stock → APPROVE
Important Notes
- Store Stock always refers to what's currently in the selected storeroom — it's the starting point for both Assign and Deduct.
- On the Assign form, Available Stock comes from overall inventory, not the storeroom itself — it's how much could be assigned, separate from what's already there.
- New Store Stock (Assign) and Store New Stock (Deduct) are both previews calculated automatically as you type — nothing is updated in the system until APPROVE is tapped.
- RESET clears the form without saving; it does not undo an assignment/deduction that was already approved.
- This module only appears on hubs where Inventory Management was checked under Hub Modules — see the iHospitality Hub – Setup page.