User Role
Overview
The User Role feature allows administrators to define and manage different roles within the property. User roles determine the level of access and the capabilities available to users, such as web login, app login, scheduling, and iHospitality Hub access.
Each user can be assigned an appropriate role based on their responsibilities and required system access.
User Role is a single-screen feature — existing roles are displayed in a list, and new roles can be created from the same screen.
User Role Screen
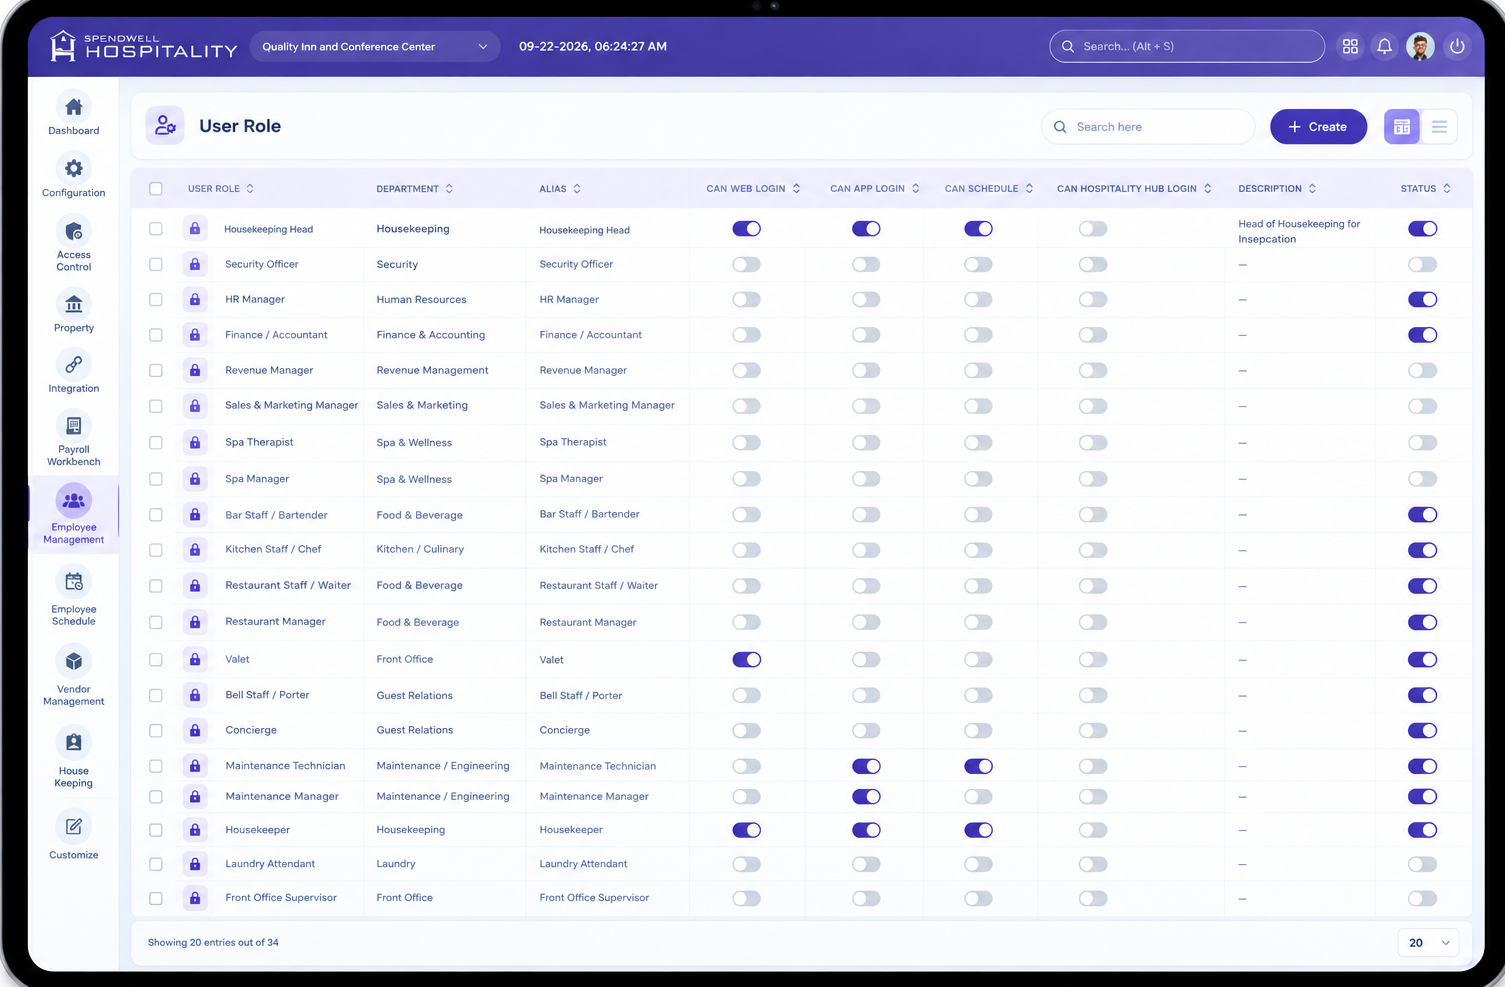
The User Role screen displays all configured user roles along with their aliases and access permissions. Administrators can review and manage the available permissions for each role directly from the list.
The screen provides the following permission controls:
- Can Web login — Controls whether users assigned to the role can log in through the web application.
- Can App login — Controls whether users assigned to the role can log in through the mobile application.
- Can Schedule — Controls whether the role has access to scheduling functionality.
- Can iHospitality Hub Login — Controls whether users assigned to the role can log in to the iHospitality Hub.
Administrators can also create a new user role using the Create button.
Key Fields
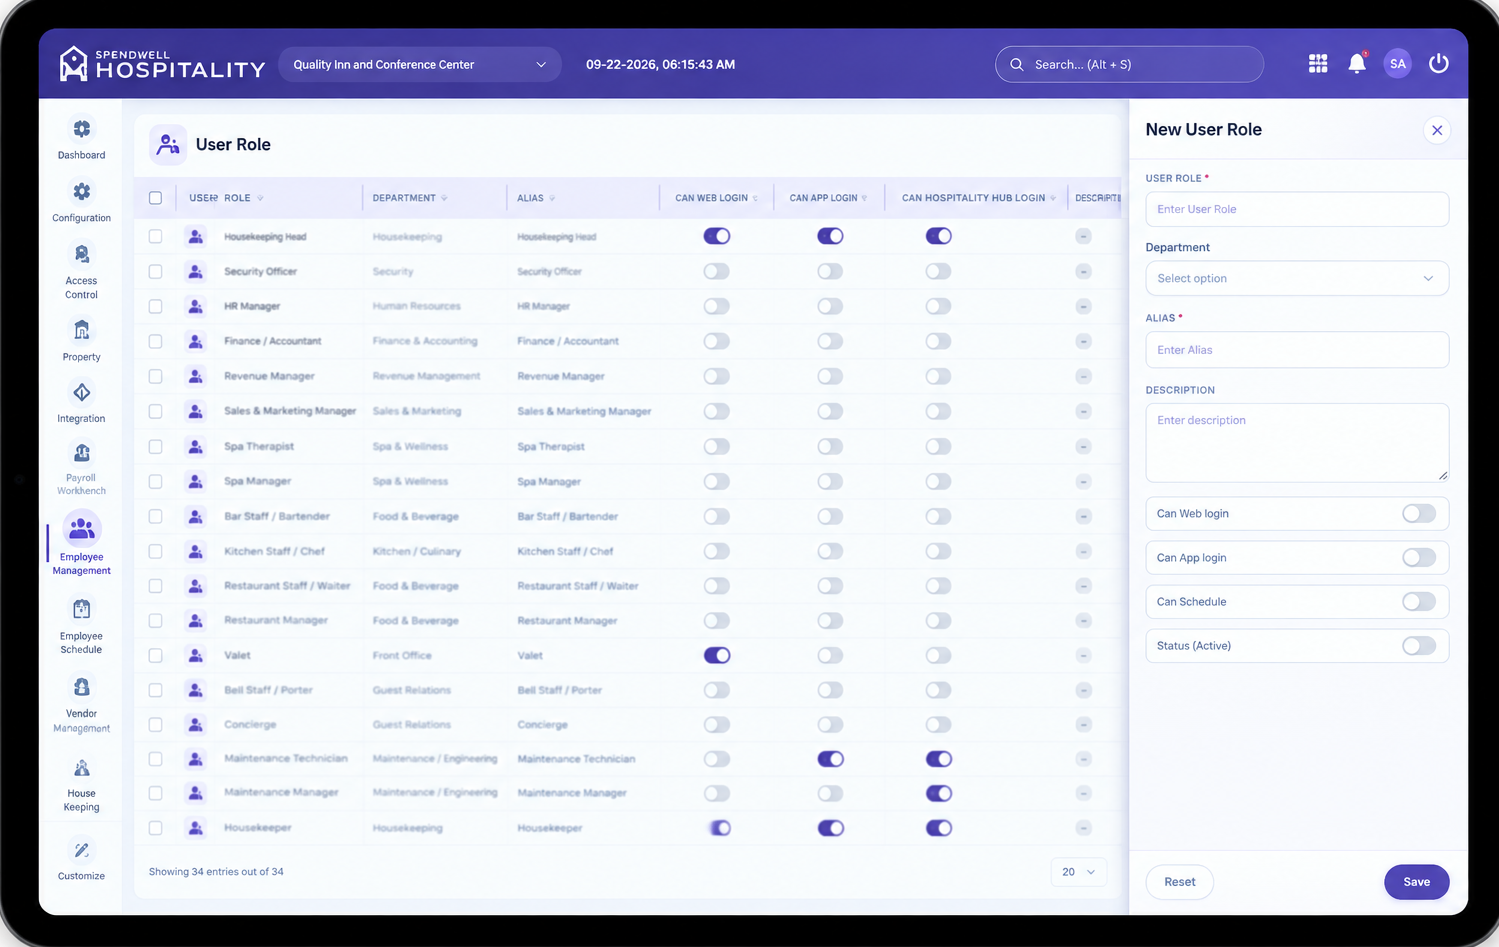
- User Role — Name of the user role being created, such as Housekeeper, Front Desk, Organization Admin, or Property Admin.
- Alias — Alternate or short name used to identify the user role.
- Can Web login — Toggle to allow or restrict web application login for the role.
- Can App login — Toggle to allow or restrict mobile application login for the role.
- Can Schedule — Toggle to allow or restrict access to scheduling functionality.
- Can iHospitality Hub Login — Toggle to allow or restrict login access to the iHospitality Hub.
- Save — Saves the user role with the configured permissions and closes the panel.
- Save & Add New — Saves the current user role and keeps the panel open so another role can be created.
- Reset — Clears the entered values without saving.
- Create — Opens the New User Role panel for creating a new role.
Steps
Create a New User Role
Important Notes
- User Role and Alias are required fields when creating a new role.
- Permission toggles determine which system features are available to users assigned to that role.
- Disabling a permission prevents the corresponding access without requiring the role to be deleted.
- Permissions should be configured according to the responsibilities of the user role.
- A role can have different combinations of web, app, scheduling, and iHospitality Hub access.
- Review the configured permissions before clicking Save to ensure the role has the appropriate access.