iHospitality Hub Setup
Overview
The iHospitality Hub feature allows administrators to register physical devices (tablets/iPads) as "Hubs," give each one its own login credentials, and choose which modules that hub can show. Once a hub is signed in, employees use it throughout the day for the modules it was given access to.
Note: an employee can only sign in to a hub at all if their assigned User Role has Can iHospitality Hub Login enabled (see the User Role page). Hub Modules (below) then control which modules that hub shows once someone is signed in.
iHospitality Hub List
The iHospitality Hub list screen shows every hub registered for the property.
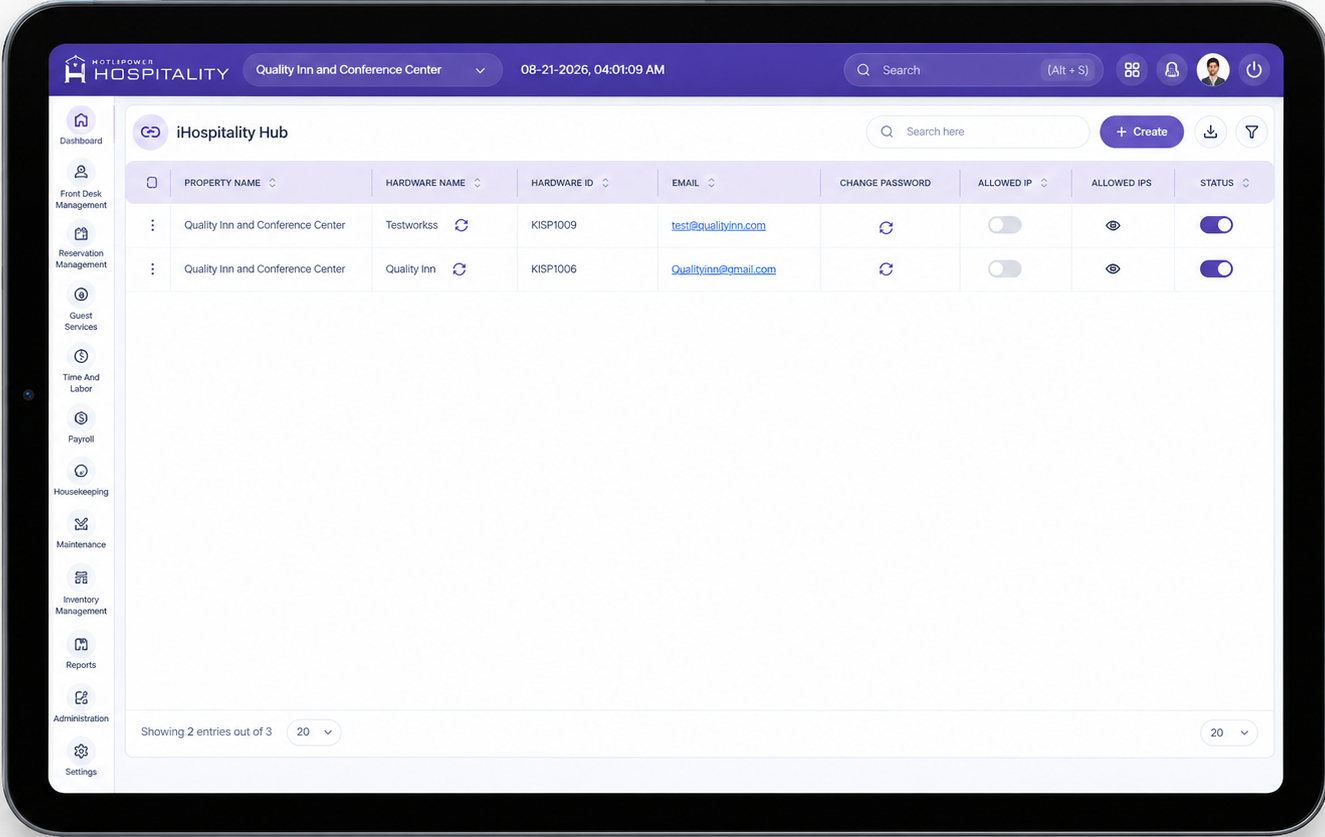
| Column | Description |
|---|---|
| Hardware Name | Name given to the device at registration, with a Reset icon next to it. |
| Hardware ID | Unique, system-generated ID for the device. |
| Login email assigned to the hub. | |
| Change Password | Icon to trigger a password reset for this hub's login. |
| Allowed IP | Toggle to restrict this hub's login to specific IP address(es) — see Key Fields below. |
What the Reset icon does: A Hardware ID is bound to one physical device at a time — once a tablet has signed in with a hub's credentials, that Hardware ID is locked to that specific device and can't simply be signed into on a different tablet. The Reset icon un-binds the Hardware ID from its current device, freeing that Hardware ID up to be activated on a different physical device. Until it's reset, one Hardware ID = one device only.
From this screen, administrators can search, filter, export the list, and click + Create to register a new hub.
Create Hub Credentials ("New iHospitality Hub")
Click + Create on the list screen to open the registration form.
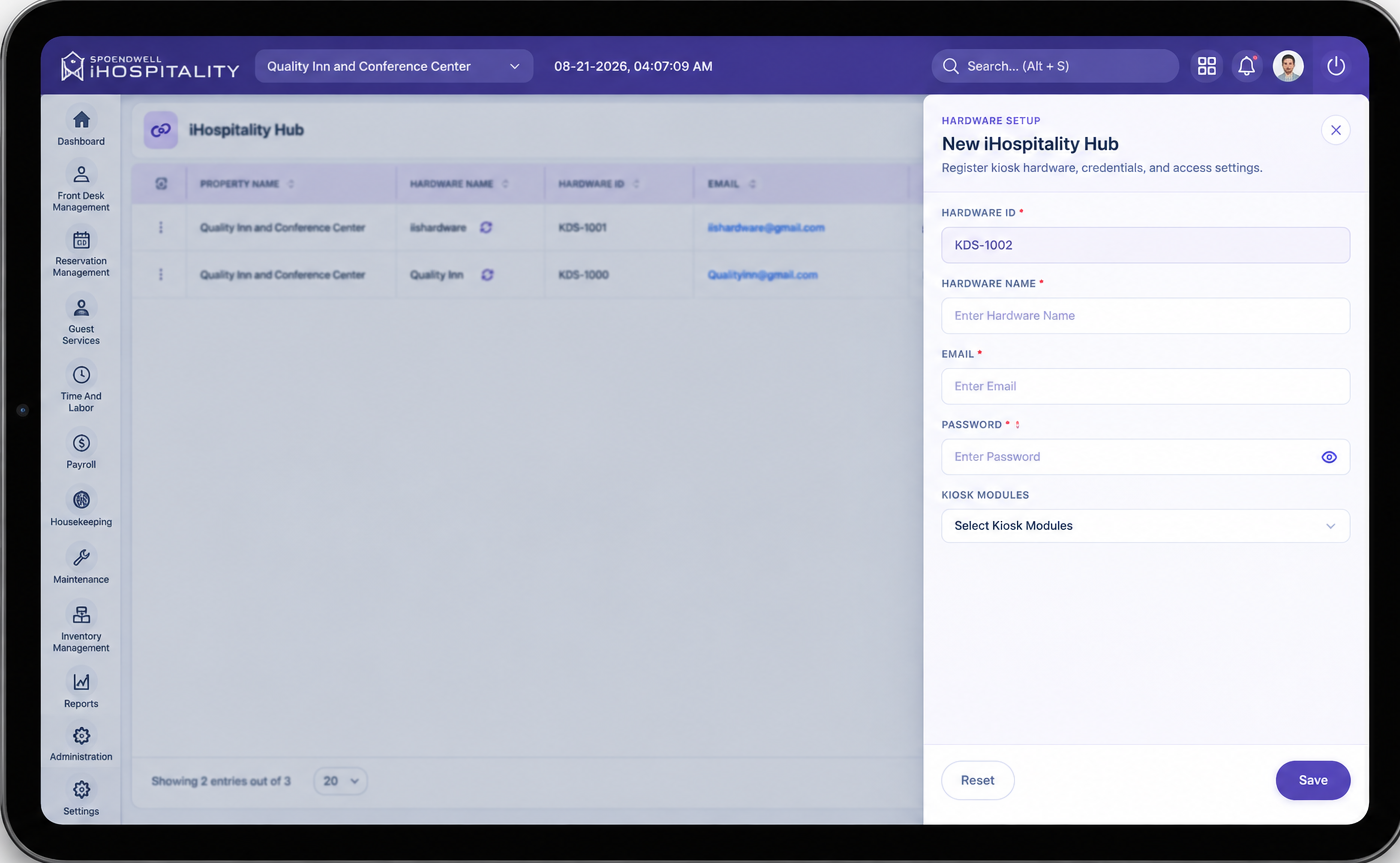
Key Fields
- Hardware ID — Auto-generated unique ID for the device (e.g.
QICC/AH-004). Read-only. - Hardware Name — The name you give this device so you can recognize it in the list, e.g., "IIS Kiosk."
- Email — The login email this hub will use to sign in on the device. This is a device-level login, separate from any individual employee's login.
- Password — The login password this hub will use to sign in on the device.
- Hub Modules — Multi-select list of the modules this hub is allowed to show once signed in: Clock In / Clock Out, Workforce Tasks, Lost & Found, and Inventory Management. Use Select All / Deselect All to check or clear everything at once.
- Save — Registers the hub and closes the form.
- Save & Add New — Registers the hub and reopens a blank form to add another one.
- Reset — Clears everything typed or selected in the form (Hardware Name, Email, Password, Hub Modules) without saving. It does not affect any hub already saved.
Steps
- Go to iHospitality Hub in the admin panel.
- Click + Create.
- Enter the Hardware Name, Email, and Password.
- Under Hub Modules, check every module this hub should have access to.
- Click Save (or Save & Add New to immediately register another hub).
Sign In on the Device
Three things happen on the physical device, in order: switch to the right hub → enter its credentials → the hub's own module page opens.
Step 1 — Open the App and Switch to the Hub
Open the iHospitality app on the tablet/iPad. On the sign-in screen, press and hold the Spendwell iHospitality logo — this is how you tell the device which registered hub it should sign in as.
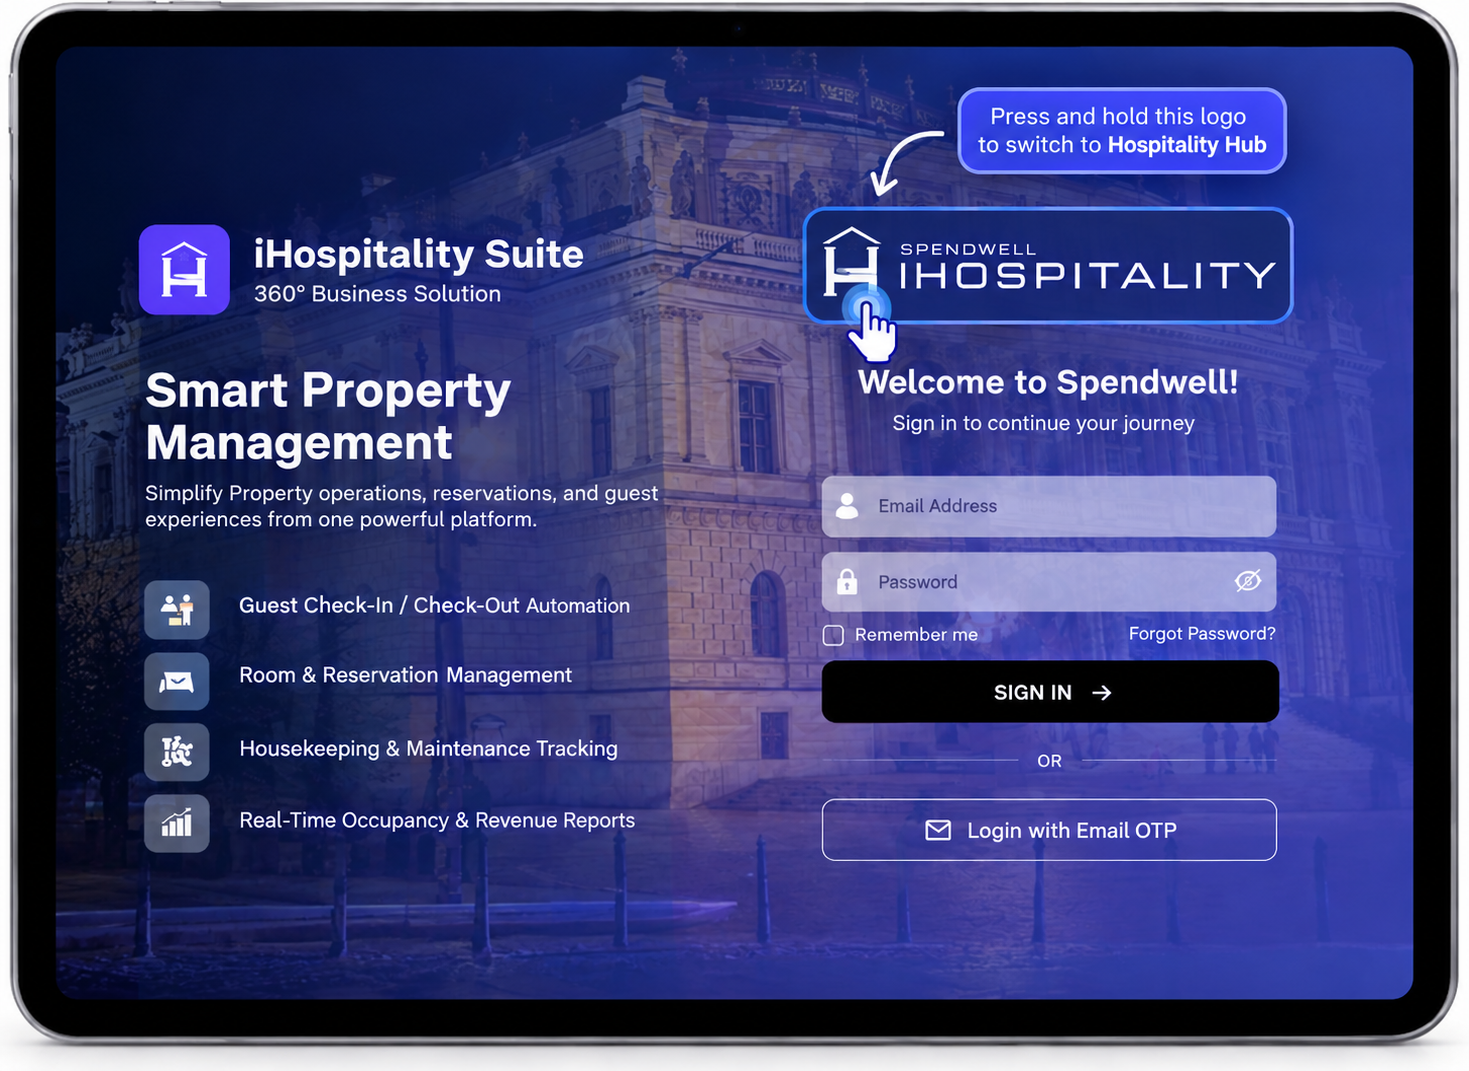
What this screen means: long-pressing the logo opens the hub-switching action. Use this both the first time a device is set up and any time you need to reassign the same device to a different hub.
Step 2 — Enter the Hub's Credentials
Enter the hub's Email and Password (the credentials created in the form above), then tap SIGN IN.
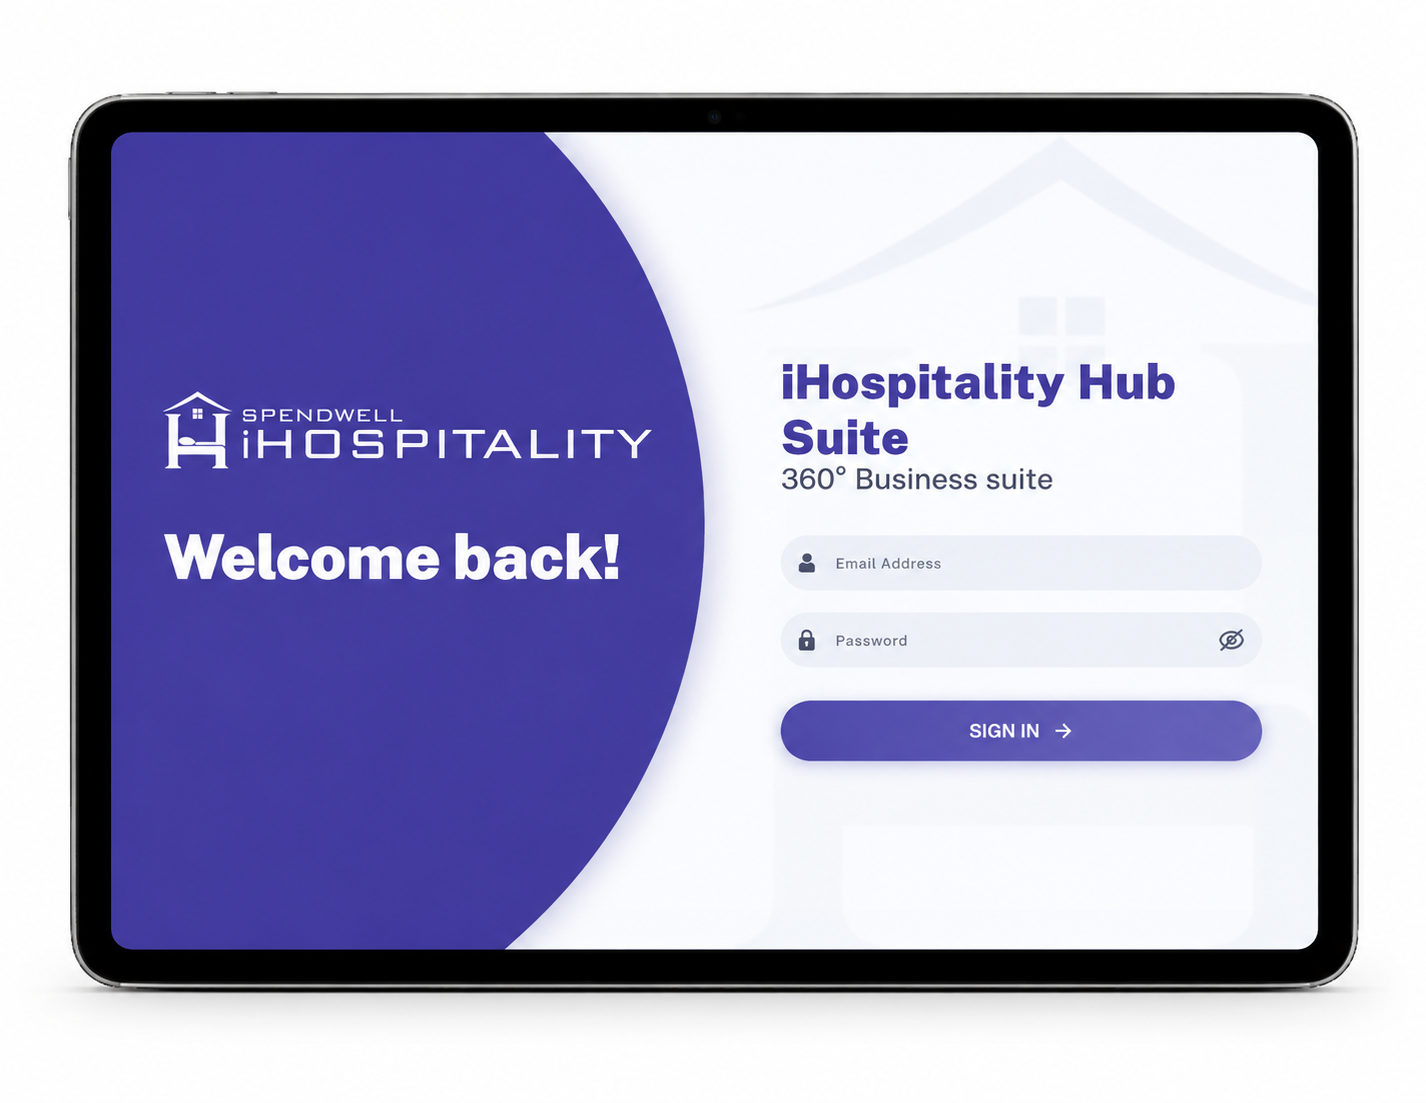
What this screen means: this is the hub's own device-level login — not an individual employee's login. Any employee using the device afterward still identifies themselves separately inside each module.
Step 3 — The Hub's Module Page Opens
Once signed in, the home screen loads, showing tiles only for the modules checked under Hub Modules when this hub was created.
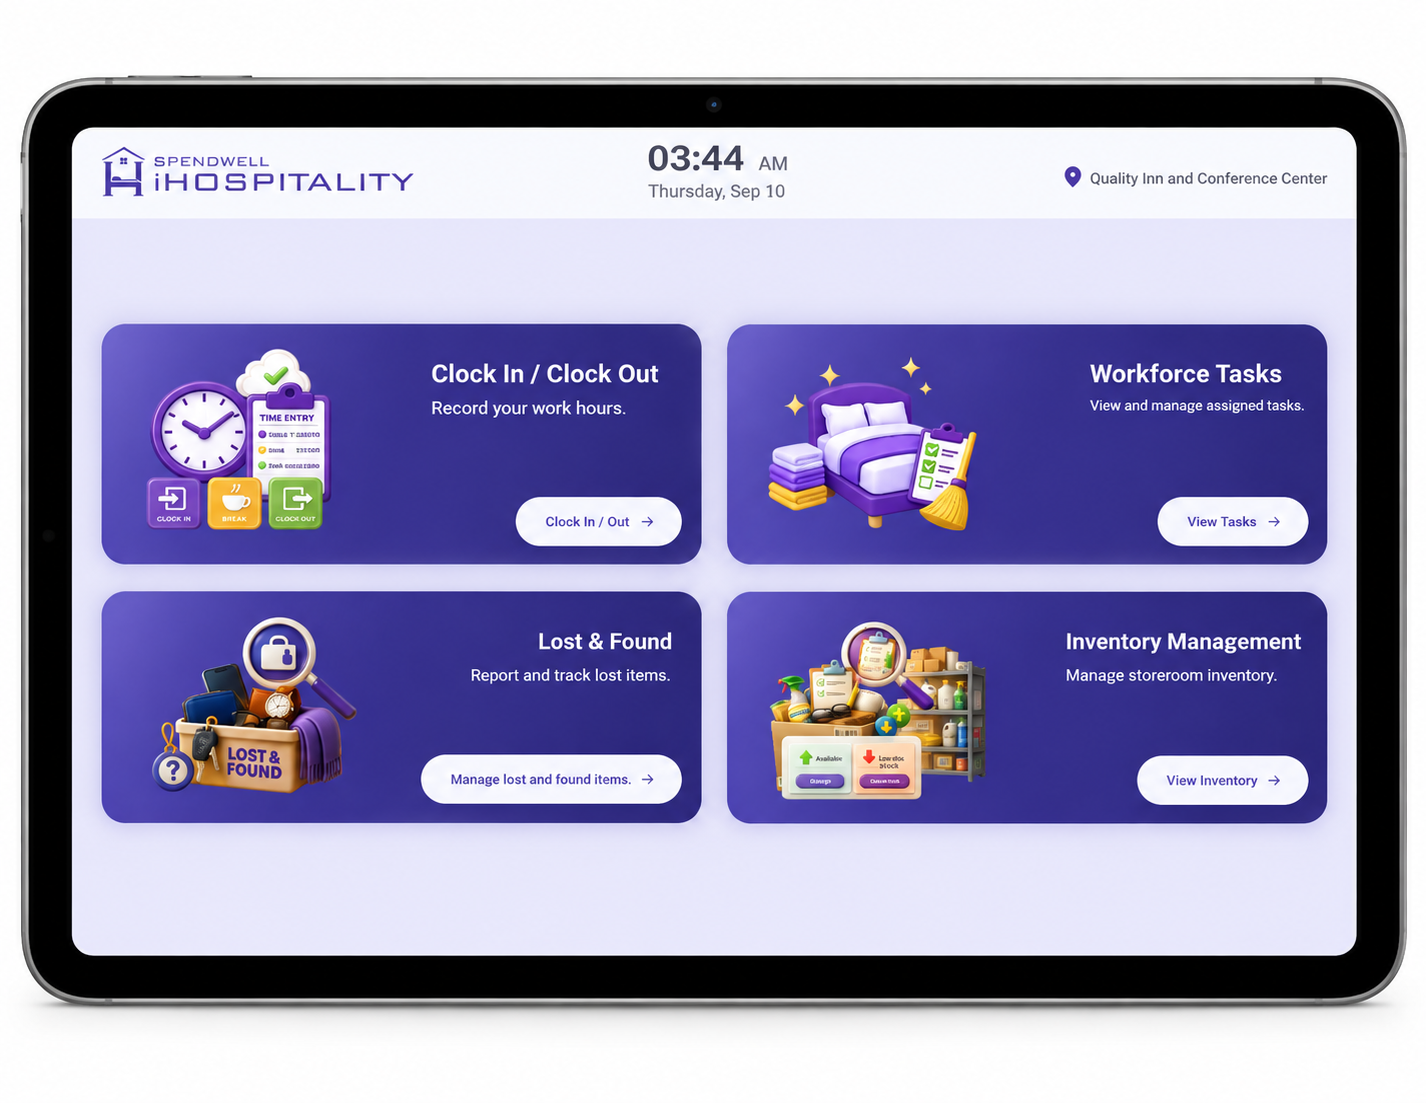
What this screen means: this is the hub's home screen for daily use. Employees tap a tile here and identify themselves (Employee ID/PIN or face login) to use that specific module.
Important Notes
- A hub's credentials (Email/Password) belong to the device, not to an individual employee — every employee who uses that hub still identifies themselves separately (Employee ID/PIN or face login) when using a module.
- An employee also needs Can iHospitality Hub Login enabled on their User Role to be able to sign in to any hub — Hub Modules alone won't grant access if that role-level permission is off.
- Only the modules checked in Hub Modules for a given hub will appear on that device — other hubs can have a different set enabled.
- Reset (on the create/edit form) only clears the form in progress; it never changes a hub that's already been saved.
- Reset (the icon on the hub list, next to Hardware Name) is different — it unbinds that Hardware ID from the device it's currently activated on, so the same Hardware ID can be signed into on another physical device. Without resetting it first, a Hardware ID stays locked to the one device it's already active on.
- The long-press-the-logo action (Sign In, Step 1) is used both for a device's first-time sign-in and for later switching an already-set-up device to a different hub.